Upcycling an Old Skirt into a Peasant Top

My Aunt Donna gave be this skirt a while back and as much as I love it- I just havent worn it much.

I decided to convert it into a peasant top so i would wear it more often… and SUCCESS!

It was so simple…

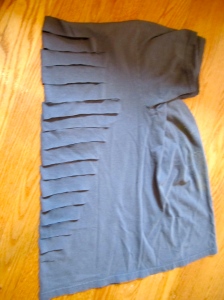
Step 1: Cut two slits equal distance from the edges.

I tried it on inside out and pinned it where I liked it.

Step 2: Sew along the slit to seam inner sleeves and sides.

Be sure your sewing wihile the item is inside out!

Step 3: You can hem your sleeves if you prefer!

But you are done!

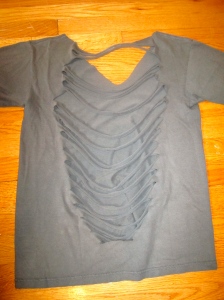
DIY Cut-Up Tee

I have been dying to make a cool cut-up tee.
After seeng my girl Aly’s shirt I was desperate to make my own!

Ispiration: Aly Freedman

Step 1: Old Tee

Step 2: Cut your desired Neckline

Step 3: Fold shirt in half but pull the front out to be sure you dont cut it!

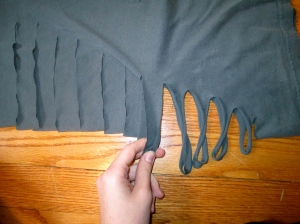
Step 4: Cut in one inch intervals.

Step 5: Pull the strips to tighten them up.

And Voila! You have a straight cut tee!

If you prefer the knot tee continue to the below steps.

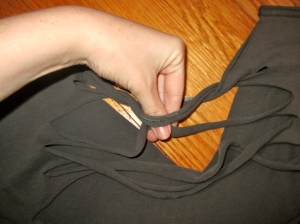
Step 6-10 : See Images. Repeat process.

Step 11: Stich the bottom loop to the bottom of the tee to secure the spot.

Step 12: Your tee is finished!

Hope you enjoyed!

See you Soon,

Kris

Eco-Craft: Butterflies


Hello everyone!

This week recycled craft is an amazing coffee filter butterfly!

Items needed:
– Large Coffee Filter
– Small Coffee Filter
– Pipe cleaner
– Liquid Watercolor Paint
– Water Droppers or Sponges. (We used droppers here)

Step 1: Have child paint the two coffee filters as they please.
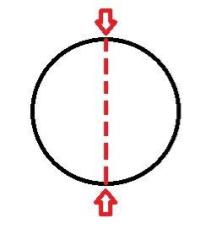
Step 2: First, Pinch small coffee filter along the dotted line. Seen Below.


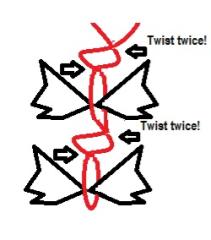
Step 3: Using the below image as a guide, wrap the small coffee filter with a pipe cleaner, twist twice and then repeat. Bend the excess pipe cleaner to make antennas.

Please excuse my how- to sketches!
Hope they made you laugh but most of all I hope they were still helpful!

See you soon,
Kristina


Eco-Craft: Sheep

For this weeks Recycled Art lesson plan, we focused on Farm Animals.

We read I Love Animals (Big Book) by Flora McDonnell.

Which is absolutely ADORABLE!

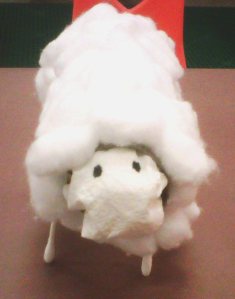
We decided to create Sheep for our main project.

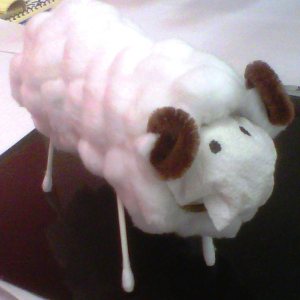
Horned Sheep

Check out the below for the details.

I must thank Luka for making our sample- he is so amazing!

Thanks Luka!

Materials:

Toilet paper roll, Cotton balls, Paper towel, Q-tips, Glue and Tape

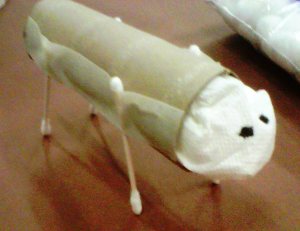
Step #1: prepare the legs (see pictured)

Prep Work

Prep Work

Step #2: stuff a paper towel into the roll and form as desired
(we made two dots for eyes with a black magic marker)

Step #3: Give the child a plate of glue and cotton balls and let them decorate!

Final Creation: Sheep

Final Creation: Sheep

Step #4: If you wouldlike you can add horns by rolling a 1.5 inch pipecleaner.

Horned Sheep

Voila! A Horned Sheep

Hope you enjoy!

See you Soon,
Kristina

Eco-Crafts: Spiders!

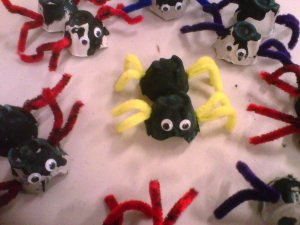
This week in my recycled art class – We read ” The Very Busy Spider” by Eric Carle. To stay with the theme, we learned the Itsy-Bitsy Spider song and created the most adorable spiders out of milk cartons! To make these spiders- we gave each child two spiders and had them paint them black. When the paint dried we slit the sides with a scissor to slide two sets of mini pipe cleaners in. (they chose the colors for there “fancy elgged spiders”). As a finishing touch-we glued on googley eyes!
The kids adored these! I highly recommend them!
Check it out :

Spiders made from Egg Cartons!

Materials: Egg carton (trimmed), googly eyes, pipe cleaners, black paint

The Very Busy Spider by Eric Carle

Thansk for stopping in!
See You soon,
Kristina